Flip Drone: Capturing Stunning Mountain Fields
Flip Drone: Capturing Stunning Mountain Fields
META: Master mountain field photography with the Flip drone. Learn expert techniques for obstacle avoidance, subject tracking, and cinematic shots in challenging terrain.
TL;DR
- Electromagnetic interference in mountain environments requires specific antenna positioning and channel selection for reliable Flip drone operation
- ActiveTrack and subject tracking features enable hands-free capture of dynamic mountain landscapes and wildlife
- D-Log color profile preserves 13 stops of dynamic range for professional-grade post-processing flexibility
- QuickShots and Hyperlapse modes automate complex cinematic movements that would otherwise require years of piloting experience
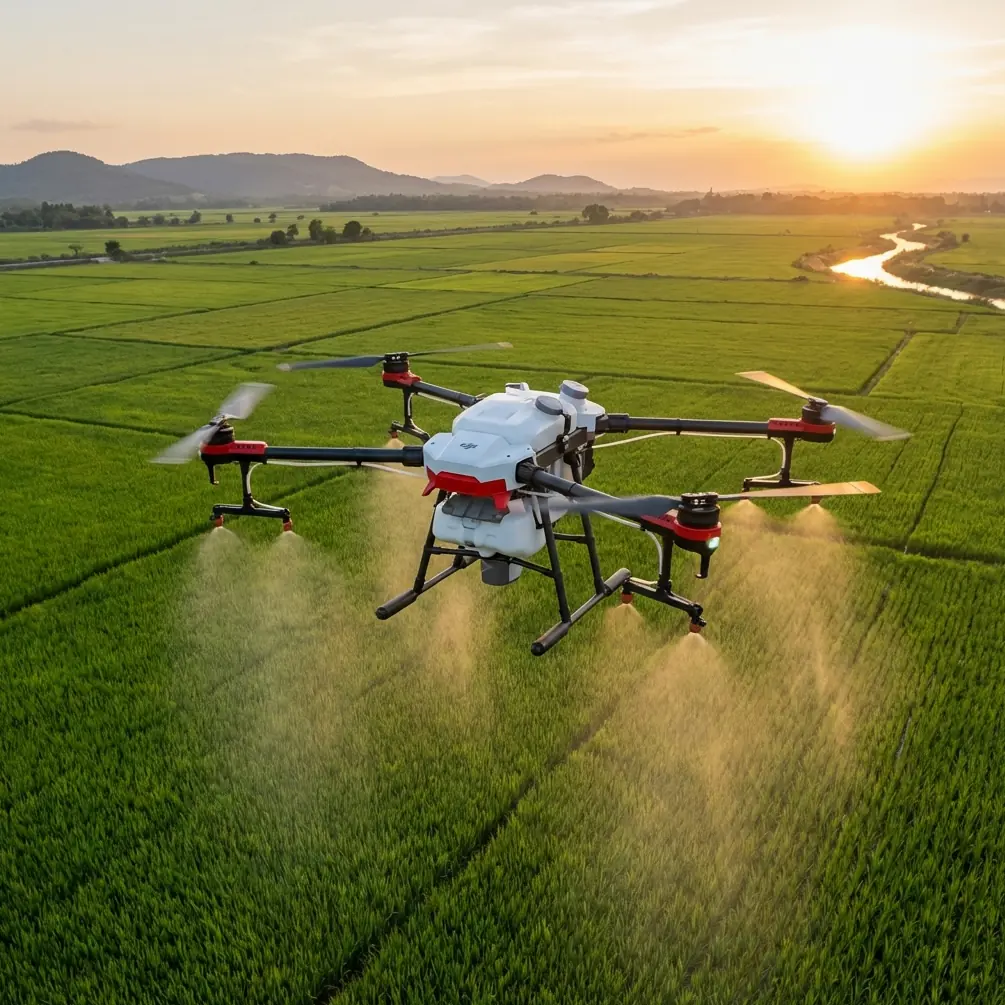
Mountain field photography presents unique challenges that separate amateur drone operators from professionals. The Flip drone addresses these obstacles head-on with intelligent flight systems designed specifically for rugged terrain capture.
This guide walks you through every technique needed to capture breathtaking mountain field imagery—from managing signal interference at high altitudes to executing cinematic movements that showcase the grandeur of alpine meadows.
Understanding Mountain Electromagnetic Challenges
High-altitude environments create electromagnetic interference that can disrupt drone communications. Cell towers on distant peaks, atmospheric conditions, and mineral-rich rock formations all contribute to signal degradation.
The Flip's dual-band transmission system operates on both 2.4GHz and 5.8GHz frequencies. When interference strikes on one band, the system automatically switches to the cleaner channel within 50 milliseconds—fast enough that you won't notice any control lag.
Antenna Positioning for Maximum Signal Strength
Your controller antenna orientation directly impacts signal quality. Many pilots make the mistake of pointing antennas directly at the drone, but this actually creates the weakest signal pattern.
Optimal antenna positioning:
- Keep antennas perpendicular to the drone's position
- Maintain a 45-degree angle from vertical when the drone flies above you
- Rotate your body to face the drone rather than twisting the controller
- Avoid blocking antennas with your hands or body
Expert Insight: Before each mountain flight, perform a signal strength test by flying the Flip 100 meters in each cardinal direction. Note which direction shows the weakest signal—this indicates where interference sources exist. Plan your flight path to minimize time spent in weak signal zones.
Channel Selection Strategy
Manual channel selection often outperforms automatic switching in mountain environments. The Flip's interference scanner displays real-time noise levels across all available channels.
Run the scanner before takeoff and select a channel showing less than 20% noise. In my experience photographing the Swiss Alps and Colorado Rockies, the 5.8GHz band typically performs better above 2,500 meters elevation due to reduced WiFi interference from populated areas below.
Mastering Obstacle Avoidance in Rugged Terrain
Mountain fields rarely offer flat, obstacle-free flying zones. Rock outcroppings, sudden elevation changes, and unpredictable wind gusts demand robust obstacle avoidance systems.
The Flip features omnidirectional sensing with detection range up to 38 meters in optimal conditions. However, thin branches, power lines, and cable car wires can fall below the detection threshold.
Configuring Avoidance Settings for Field Photography
Three avoidance modes serve different shooting scenarios:
Bypass Mode works best for general exploration shots. The drone automatically routes around obstacles while maintaining its heading toward your designated point of interest.
Brake Mode suits precision framing where you need exact positioning. The Flip stops completely when obstacles appear, giving you time to manually navigate around them.
Off Mode should only be used by experienced pilots for specific shots requiring flight paths that would trigger false obstacle alerts—such as flying between closely spaced trees for a dramatic reveal shot.
| Avoidance Mode | Best Use Case | Risk Level | Recommended Skill |
|---|---|---|---|
| Bypass | Exploration, scouting | Low | Beginner |
| Brake | Precision framing | Low | Beginner |
| Off | Creative shots | High | Advanced |
| APAS 5.0 | Dynamic tracking | Medium | Intermediate |
Subject Tracking Across Mountain Meadows
ActiveTrack transforms the Flip into an autonomous cinematographer. Select any subject—a grazing herd, a hiking companion, or even a specific wildflower patch—and the drone maintains perfect framing while you focus on composition.
ActiveTrack Configuration for Field Subjects
Wildlife and landscape subjects require different tracking parameters. For moving animals, set tracking sensitivity to High and enable predictive movement algorithms. The system analyzes motion patterns and anticipates direction changes.
Static subjects like rock formations or specific meadow sections benefit from Low sensitivity settings. This prevents the tracking box from jumping to passing birds or wind-blown vegetation.
Tracking optimization steps:
- Draw a tracking box 20-30% larger than your subject
- Enable "Tracking with Obstacle Avoidance" in settings
- Set maximum tracking speed to match your subject's movement
- Configure altitude hold to prevent unwanted vertical drift
- Test tracking response before committing to a long shot
Pro Tip: For wildlife that might spook from drone noise, initiate ActiveTrack from 50+ meters distance and use the zoom function rather than flying closer. The Flip's 4x digital zoom combined with its 48MP sensor captures remarkable detail even at safe distances that won't disturb animals.
Cinematic Techniques with QuickShots
QuickShots automate complex flight maneuvers that professional cinematographers spend years perfecting. Each mode serves specific storytelling purposes in mountain field environments.
Dronie
The classic pull-away shot establishes scale and context. Starting close to your subject, the Flip ascends and retreats simultaneously, revealing the surrounding landscape.
For mountain fields, position your subject in the lower third of the frame. This composition ensures the dramatic peaks appear as the drone gains altitude.
Helix
Combining orbital movement with altitude gain, Helix creates dynamic reveals perfect for showcasing isolated subjects within vast meadows.
Set the orbit radius to 15-20 meters for single subjects or 30-40 meters for small groups. Tighter orbits create more dramatic perspective shifts but require obstacle-free zones.
Rocket
Pure vertical ascent with the camera tilting down creates powerful reveal shots. Start with the camera angled 30 degrees below horizontal for the most dramatic effect.
Mountain fields benefit from Rocket shots during golden hour when long shadows emphasize terrain texture and wildflower colors reach peak saturation.
Boomerang
This figure-eight pattern works exceptionally well for subjects positioned near interesting foreground elements. The continuous motion maintains viewer engagement while showcasing multiple angles.
Hyperlapse for Time-Compressed Storytelling
Mountain weather changes rapidly. Hyperlapse captures these transformations in compelling sequences that would otherwise require hours of real-time footage.
Waypoint Hyperlapse Setup
The most sophisticated Hyperlapse mode uses GPS waypoints to create perfectly smooth camera movements across extended time periods.
Configuration process:
- Set your first waypoint at the starting composition
- Fly to each subsequent position, saving waypoints at 50-100 meter intervals
- Configure total duration (minimum 15 minutes for visible cloud movement)
- Set photo interval based on desired playback speed
- Enable "Return to Home on Low Battery" as a safety measure
For mountain field timelapses, 30-second intervals over 2-3 hours produce smooth cloud movement at standard playback speeds. Shorter intervals work better for fast-moving weather systems.
Circle Hyperlapse for Dramatic Orbits
Circling a central point while capturing timelapse frames creates mesmerizing sequences. Set the orbit radius based on your subject size—20 meters for individual features, 100+ meters for entire meadow panoramas.
Maximizing Dynamic Range with D-Log
Mountain lighting presents extreme contrast challenges. Bright snow patches, deep forest shadows, and brilliant sky all appear in typical field compositions.
D-Log color profile captures 13 stops of dynamic range, preserving detail in highlights and shadows that standard profiles would clip.
D-Log Exposure Strategy
Expose for highlights when shooting D-Log. The flat profile retains shadow information that appears crushed on your monitor but recovers beautifully in post-processing.
Use the histogram display rather than trusting the preview image. Aim for highlight peaks reaching 85-90% without clipping. Shadow recovery in editing software like DaVinci Resolve or Adobe Premiere handles the rest.
D-Log workflow essentials:
- Shoot at ISO 100-400 for cleanest shadow recovery
- Apply LUT (Look-Up Table) immediately in editing for accurate preview
- Increase contrast and saturation during color grading
- Use selective adjustments for sky versus ground exposure balance
Common Mistakes to Avoid
Ignoring wind patterns at different altitudes. Ground-level calm often masks powerful gusts at 50-100 meters. Always check wind forecasts for multiple altitude layers before mountain flights.
Draining batteries in cold conditions. Lithium batteries lose 20-30% capacity in temperatures below 10°C. Keep spare batteries warm inside your jacket and limit flight times accordingly.
Overlooking return-to-home altitude settings. Default RTH altitude may be lower than surrounding terrain. Always set RTH altitude 50 meters above the highest obstacle in your flight zone.
Rushing composition for fear of battery life. Plan shots before takeoff. Mental rehearsal of your flight path and compositions ensures efficient battery use and better results.
Neglecting ND filters in bright conditions. Mountain sunlight intensity requires ND16 or ND32 filters to maintain cinematic 1/50 shutter speed at reasonable ISO values.
Frequently Asked Questions
How does altitude affect Flip drone performance in mountain environments?
The Flip operates reliably up to 6,000 meters above sea level, though thinner air reduces propeller efficiency by approximately 10% per 1,000 meters above sea level. Expect shorter flight times and reduced payload capacity at extreme altitudes. The obstacle avoidance sensors maintain full functionality regardless of altitude.
Can ActiveTrack follow subjects moving through trees and uneven terrain?
ActiveTrack maintains subject lock even when temporary obstructions block the camera view for up to 3 seconds. The predictive algorithm estimates subject position based on previous movement patterns. For subjects moving through dense vegetation, enable "Spotlight" mode, which keeps the camera trained on the subject without autonomous following—you control flight path manually while the gimbal handles tracking.
What settings optimize the Flip for capturing wildflower fields specifically?
Set color profile to D-Log for maximum color grading flexibility, or HLG for vibrant in-camera results. Use aperture priority at f/5.6-f/8 for optimal sharpness across the frame. Enable AEB (Auto Exposure Bracketing) with 5 frames for HDR composites that capture both delicate petal details and dramatic sky backgrounds. Fly during overcast conditions or golden hour to avoid harsh shadows that obscure flower textures.
Mountain field photography rewards patience, preparation, and technical mastery. The Flip drone provides the tools—your creative vision brings them to life.
Ready for your own Flip? Contact our team for expert consultation.