Inspecting Vineyards with Flip | Urban Guide
Inspecting Vineyards with Flip | Urban Guide
META: Learn how to inspect urban vineyards with the Flip drone. Master flight altitudes, D-Log color, ActiveTrack, and obstacle avoidance for stunning results.
TL;DR
- Fly between 15–25 meters altitude for optimal vineyard row coverage in urban settings without losing critical canopy detail.
- Use D-Log color profile to capture the full dynamic range of vine health indicators, including subtle chlorosis and nutrient stress.
- Leverage ActiveTrack and obstacle avoidance to navigate tight urban vineyard corridors safely alongside buildings, trellises, and power lines.
- Combine Hyperlapse and QuickShots modes to create compelling visual reports that vineyard managers and stakeholders actually want to review.
Why Urban Vineyard Inspections Demand a Smarter Approach
Urban vineyards sit in some of the most challenging airspace a drone pilot will ever navigate. Between rooftop gardens in Brooklyn, terraced plots in Portland, and heritage vineyards squeezed between commercial buildings in Napa's downtown, the margin for error is razor-thin. The Flip gives you the sensor accuracy, intelligent flight modes, and compact form factor needed to inspect these plots efficiently—without risking a collision with a neighboring structure.
I'm Jessica Brown, a photographer who's spent the last three years shooting agricultural inspections from the air. This guide walks you through my exact workflow for using the Flip to inspect urban vineyards, from pre-flight planning to post-processing deliverables that vineyard managers rely on for seasonal decisions.
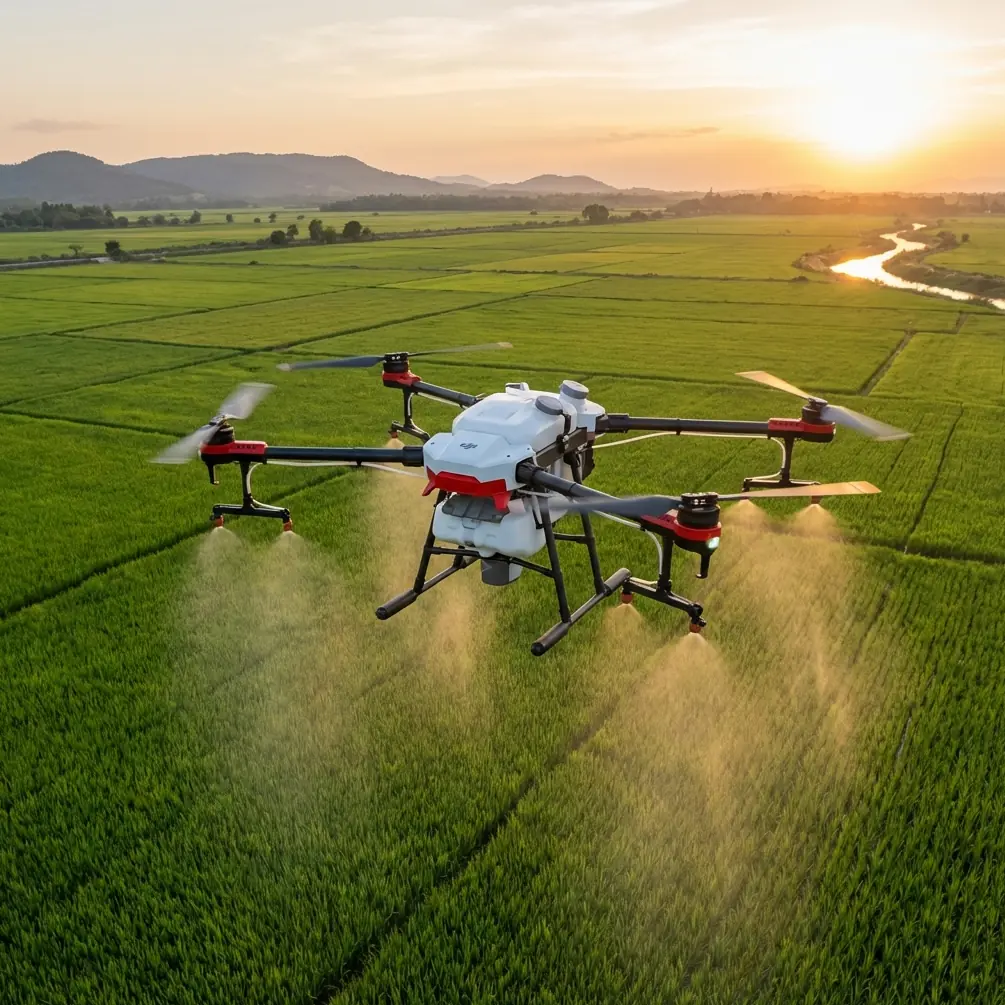
Expert Insight: The sweet spot for urban vineyard inspection altitude is 18–22 meters AGL (above ground level). Below 15 meters, you lose contextual coverage of row patterns. Above 25 meters, individual vine detail degrades, and you risk entering controlled airspace near urban airports. At 20 meters, the Flip's sensor resolves leaf-level detail across a 30-meter swath, which typically covers 4–6 vineyard rows per pass.
Step 1: Pre-Flight Planning for Urban Vineyard Sites
Assess the Airspace
Urban environments introduce airspace restrictions that rural vineyard pilots never encounter. Before you even unbox the Flip, complete these checks:
- Verify FAA airspace classification using B4UFLY or Aloft. Many urban vineyards fall within Class B or C surface areas.
- Check local municipal drone ordinances — some cities require permits for commercial flights below 400 feet in dense areas.
- Map nearby obstacles including buildings, cell towers, power lines, and tall trees that border the vineyard plot.
- Identify emergency landing zones — in an urban setting, you need at least two clear spots within 50 meters of your flight path.
- Note sun angle and wind patterns between buildings. Urban canyons create unpredictable gusts that peak between 11:00 AM and 2:00 PM.
Configure the Flip for the Environment
The Flip's compact size is an immediate advantage in tight urban plots, but you need to configure it intentionally:
- Enable obstacle avoidance on all axes. Urban vineyards have vertical hazards (buildings) and horizontal hazards (trellises, wires) simultaneously.
- Set return-to-home altitude 5 meters above the tallest nearby structure to prevent collision during automated RTH sequences.
- Format your microSD card and confirm minimum 64 GB capacity — a full vineyard inspection generates 8–12 GB of footage and stills.
Step 2: Optimal Camera Settings for Vine Health Assessment
Getting the camera settings right determines whether your inspection data is actionable or decorative. Here's what I use on every urban vineyard flight with the Flip.
Shoot in D-Log
D-Log is non-negotiable for vineyard inspections. The flat color profile preserves up to 3 additional stops of dynamic range compared to standard color modes. This matters because:
- Healthy vines and stressed vines often differ by only slight shifts in green-to-yellow hue that standard profiles clip.
- Urban settings create harsh shadow-to-highlight transitions where buildings cast deep shadows across vine rows while adjacent rows sit in full sun.
- D-Log footage grades beautifully in post, allowing you to pull out NDVI-adjacent color data from RGB imagery when you apply the right LUTs.
Recommended Camera Parameters
| Parameter | Recommended Setting | Why It Matters |
|---|---|---|
| Color Profile | D-Log | Maximum dynamic range for health analysis |
| Resolution | 4K / 30fps | Enough detail for per-vine assessment |
| Shutter Speed | 1/60s (video) / 1/500s (stills) | Eliminates motion blur at cruise speed |
| ISO | 100–400 | Keeps noise floor below visible threshold |
| White Balance | 5600K (manual) | Consistent color across flight passes |
| Aspect Ratio | 16:9 (video) / 3:2 (stills) | Optimal for report formatting and mapping |
| File Format | RAW + JPEG (stills) | RAW for analysis, JPEG for quick review |
Pro Tip: Lock white balance to manual 5600K before takeoff. Auto white balance shifts between passes as the Flip's angle to the sun changes, creating inconsistent color data that makes vine health comparison across rows unreliable. A locked value at 5600K matches midday daylight and keeps your color science consistent.
Step 3: Flight Patterns That Maximize Coverage
The Lawnmower Grid
For systematic inspection, fly the Flip in a lawnmower pattern — parallel passes along the length of vine rows with 60–70% lateral overlap between passes. This overlap is essential for:
- Stitching orthomosaic maps in software like Pix4D or DroneDeploy
- Ensuring no gaps exist between rows where early-stage disease might hide
- Providing redundant angles on each vine for 3D canopy volume estimation
At 20 meters altitude with the Flip's field of view, set your parallel pass spacing to approximately 12 meters to achieve 65% overlap.
Use ActiveTrack for Row-Following Passes
After completing your systematic grid, switch to ActiveTrack mode for targeted row-following passes at 8–10 meters altitude. This lower altitude gives you:
- Per-vine resolution sufficient to identify individual leaves with discoloration
- Close-range footage for stakeholder presentations
- The ability to track a specific row's trajectory even as it curves around urban landscape features
ActiveTrack combined with obstacle avoidance allows the Flip to autonomously follow a vine row while simultaneously avoiding trellising posts, irrigation hardware, and boundary fences. Keep your hands near the sticks, but let the system do the navigation work.
Add Hyperlapse and QuickShots for Stakeholder Content
Raw inspection data wins contracts. Polished visual content keeps them. After completing your technical passes, allocate 10–15 minutes for creative footage:
- Hyperlapse: Set a circle or waypoint Hyperlapse around the vineyard perimeter. A 30-second Hyperlapse covering a 3-minute real-time flight compresses an entire site overview into a shareable clip.
- QuickShots Dronie: Position the Flip over the vineyard's most photogenic section and execute a Dronie QuickShot. This pulls back and up simultaneously, revealing the urban context — the city skyline framing the vineyard creates a powerful visual narrative.
- QuickShots Rocket: A vertical ascent shot from canopy level to 30 meters showcases row geometry and overall plot health at a glance.
These assets take minutes to capture but dramatically increase the perceived value of your inspection reports.
Step 4: Post-Processing Your Inspection Data
Color Grading D-Log Footage
Import your D-Log footage into DaVinci Resolve or Adobe Premiere. Apply a Rec. 709 conversion LUT as your base, then fine-tune:
- Push saturation by 10–15% to make green health gradients visible
- Adjust midtone contrast to separate healthy canopy from stressed foliage
- Use hue vs. hue curves to isolate yellow-green stress indicators without shifting healthy green tones
Building the Orthomosaic
Upload your grid-pattern stills to mapping software. The 60–70% overlap you captured ensures the software can identify sufficient tie points between images. Expect processing time of 45–90 minutes for a typical urban vineyard plot of 1–3 acres.
The resulting orthomosaic gives vineyard managers a georeferenced, zoomable map of their entire plot. Overlay this on historical data to track vine health trends across seasons.
Common Mistakes to Avoid
- Flying too high for meaningful data. Above 25 meters, you lose per-vine detail entirely. The overhead perspective looks impressive but lacks diagnostic value.
- Leaving obstacle avoidance off to "fly faster." Urban vineyards have too many unpredictable vertical elements. One collision costs more time than an entire cautious flight.
- Using auto white balance. Your color data becomes inconsistent across passes, rendering comparative health analysis unreliable.
- Skipping the creative shots. Vineyard managers and investors respond to polished Hyperlapse and QuickShots content. Technical data alone won't differentiate your service.
- Ignoring wind patterns between buildings. Urban canyon effects create turbulence that doesn't exist in open-field vineyards. Check gusts between structures before every flight, not just at your launch point.
- Neglecting to format the SD card before each inspection. Corrupted files from a previous session can cause recording failures mid-flight, and you may not notice until you're back at your desk.
Frequently Asked Questions
What is the best altitude for inspecting urban vineyards with the Flip?
The optimal altitude range is 18–22 meters AGL. At this height, the Flip's camera resolves individual vine detail while maintaining enough coverage width to capture 4–6 rows per pass. Going lower than 15 meters fragments your coverage, and going higher than 25 meters sacrifices the resolution needed for health assessment. If you need per-leaf detail on specific vines, drop to 8–10 meters using ActiveTrack for targeted follow-up passes after completing your primary grid.
Can I use the Flip for vineyard inspections without a Part 107 license?
No. If you're inspecting vineyards commercially — meaning you're being compensated for the flight or the data — the FAA requires a Part 107 Remote Pilot Certificate. Urban flights add complexity because many city vineyards sit within controlled airspace, requiring LAANC authorization or a manual airspace waiver. Recreational exceptions do not apply to inspection work, regardless of the drone's size or the flight's duration.
How does subject tracking help during vineyard row inspections?
ActiveTrack allows the Flip to autonomously follow a selected vine row while maintaining consistent framing and altitude. This frees you to monitor obstacle clearance and battery life instead of manually steering through narrow 2–3 meter row gaps. The system uses visual recognition to track the row's trajectory, adjusting for curves and elevation changes. Combined with obstacle avoidance, ActiveTrack turns a high-concentration manual flight into a manageable, repeatable process that produces consistent footage across every row.
Urban vineyard inspection with the Flip combines technical precision with creative storytelling. The drone's intelligent flight modes, compact airframe, and advanced camera system make it the right tool for navigating complex urban plots where larger platforms can't safely operate. Master the altitude, lock your settings, and let ActiveTrack handle the tricky corridors.
Ready for your own Flip? Contact our team for expert consultation.