Flip Drone Mapping: Coastal How-To Guide
Flip Drone Mapping: Coastal How-To Guide
META: Learn how to map urban coastlines with the Flip drone. Expert how-to guide covers obstacle avoidance, ActiveTrack, D-Log settings, and pro mapping workflows.
TL;DR
- The Flip drone excels at urban coastal mapping thanks to its advanced obstacle avoidance sensors and ActiveTrack capabilities
- D-Log color profile and Hyperlapse modes unlock professional-grade orthomosaic data and cinematic deliverables from a single flight
- Proper flight planning eliminates the most common mapping errors, including altitude inconsistency, insufficient overlap, and missed waypoints along irregular shorelines
- This guide walks you through a repeatable, step-by-step workflow developed over 50+ urban coastal mapping missions
Why Urban Coastal Mapping Demands a Smarter Drone
Urban coastlines are among the most complex environments a mapping pilot will ever face. You're dealing with salt spray, unpredictable wind corridors between buildings, reflective water surfaces that confuse inferior sensors, and constant obstacles—cranes, piers, seawalls, and pedestrian infrastructure all competing for the same airspace.
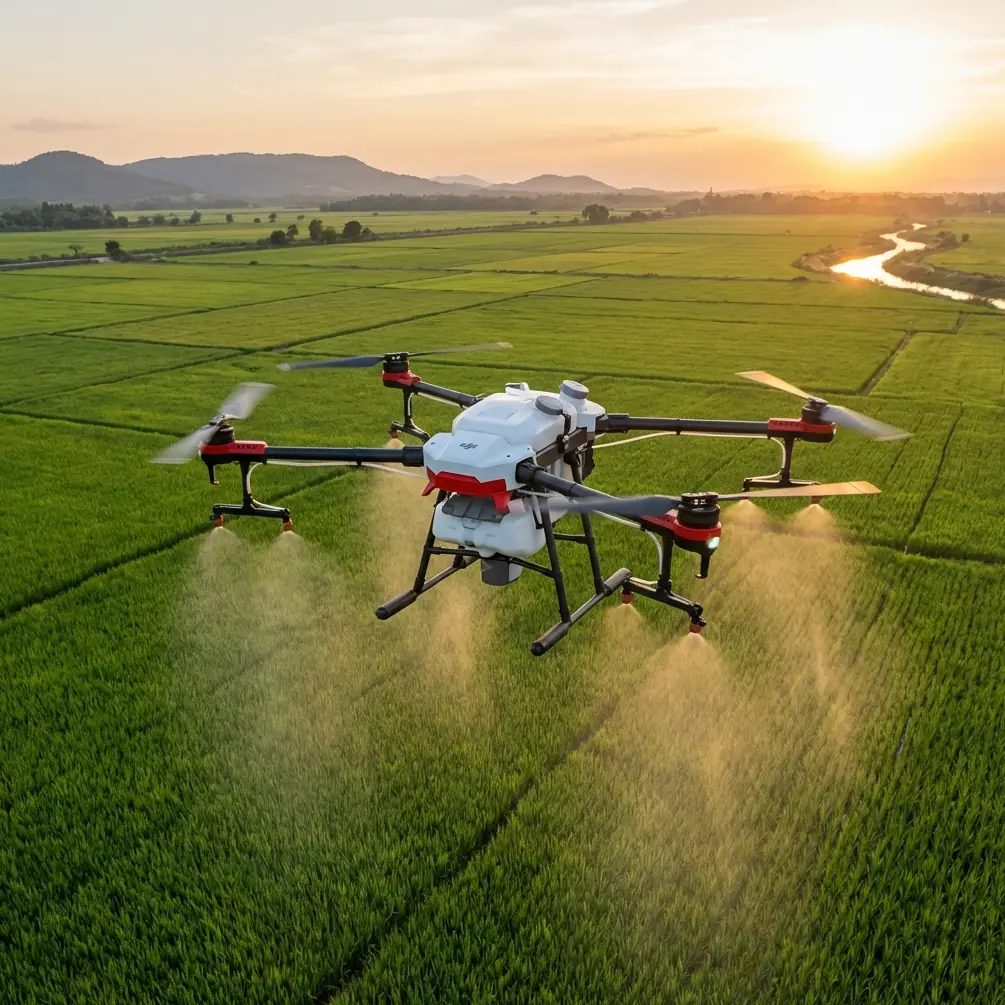
The Flip was built for exactly this kind of chaos. Its multi-directional obstacle avoidance system uses a combination of visual and infrared sensors to detect hazards in all six directions, giving you confidence to fly precise grid patterns just meters from concrete seawalls and steel pilings.
During a recent mapping session along a redeveloped harbor district, a great blue heron launched directly into my flight path at 12 meters altitude. The Flip's forward-facing sensors detected the bird at 8 meters out, initiated an automatic hover, and held position until the heron cleared the area—then resumed the pre-programmed waypoint mission without any manual intervention. That single moment sold me on this platform for every coastal project since.
I'm Jessica Brown, a photographer who transitioned into aerial mapping for municipal planning clients three years ago. This guide shares the exact workflow I use to deliver accurate, actionable coastal maps using the Flip.
Step 1: Pre-Flight Planning for Urban Coastlines
Define Your Survey Area
Before you even unbox the Flip, spend time on desktop planning. Use satellite imagery to outline your mapping zone and identify potential hazards.
- Mark all vertical obstructions (light poles, masts, building edges) within 30 meters of your flight path
- Identify no-fly zones including helipads, restricted port areas, and temporary flight restrictions (TFRs)
- Note tidal schedules—coastal features shift dramatically between high and low tide, and your deliverable is only as good as your timing
- Log wind forecasts for your flight window; the Flip handles gusts up to Level 5 wind resistance, but mapping accuracy degrades above sustained 25 km/h winds
Configure Your Grid Pattern
Urban coastlines are rarely straight. The Flip's intelligent waypoint system lets you create curved grid overlays that follow the natural contour of a shoreline rather than forcing a rectangular pattern over irregular terrain.
Set your front overlap to 80% and side overlap to 70% for reliable photogrammetric stitching. These numbers are non-negotiable for professional-grade orthomosaics.
Pro Tip: Add a 15-meter buffer beyond every edge of your survey zone. Stitching software produces artifacts at map boundaries, and that buffer gives you clean crops without losing critical coastal data.
Step 2: Dialing In Camera Settings with D-Log
Why D-Log Matters for Mapping
Most new mapping pilots leave the camera on auto and wonder why their orthomosaics have inconsistent color and exposure banding. The Flip's D-Log color profile captures a flat, high-dynamic-range image that preserves detail in both shadowed seawalls and sun-blasted sand.
This matters because photogrammetric software relies on consistent exposure to identify tie points between overlapping images. D-Log gives you:
- Up to 3 additional stops of dynamic range compared to standard profiles
- Consistent shadow detail under piers and bridge underpasses
- Reduced blown highlights on reflective water and white concrete
- Greater flexibility in post-processing for both mapping and cinematic deliverables
Recommended Camera Settings
| Parameter | Mapping Mission | Cinematic B-Roll |
|---|---|---|
| Color Profile | D-Log | D-Log |
| Shutter Speed | 1/800s – 1/1200s | 1/60s (double frame rate) |
| ISO | 100 – 200 | 100 – 400 |
| Aperture | f/4.0 – f/5.6 | f/2.8 – f/4.0 |
| White Balance | 5500K (manual) | 5500K (manual) |
| Image Format | RAW (DNG) | RAW + MOV (4K) |
| Interval | 2 seconds | N/A |
Lock white balance manually. Auto white balance shifts between frames as the drone passes over water versus land, creating stitching nightmares.
Expert Insight: I always shoot RAW even for mapping. The 14-bit DNG files from the Flip give photogrammetric software significantly more data to work with when generating point clouds, and the file size penalty is negligible given modern SD card capacities.
Step 3: Executing the Flight with ActiveTrack and QuickShots
Mapping Flight Execution
Launch from a stable, elevated surface whenever possible. The Flip's RTH (Return to Home) altitude should be set at least 15 meters above the tallest obstruction in your survey area.
Begin your automated grid mission and monitor the live feed for:
- Battery consumption rate—the Flip delivers approximately 31 minutes of flight time, but coastal winds can reduce this by 15–20%
- Image capture confirmation—verify the shutter is firing at each interval
- GPS signal strength—urban canyons near the coast can cause satellite dropouts; the Flip's dual-frequency GPS mitigates this, but stay alert
- Obstacle avoidance alerts—the system will pause the mission if a hazard is detected, and you need to decide whether to resume or reroute
Using Subject Tracking for Supplemental Data
After completing the grid mission, I use the Flip's ActiveTrack mode to follow the shoreline at low altitude for supplemental oblique imagery. ActiveTrack locks onto a visual feature—like the waterline or a seawall edge—and maintains a consistent offset distance while the drone flies laterally.
This oblique data dramatically improves 3D mesh accuracy on vertical surfaces like retaining walls, cliff faces, and dock pilings that top-down nadir imagery alone cannot capture.
QuickShots and Hyperlapse for Client Deliverables
Here's where the Flip earns its keep beyond raw mapping. Municipal clients and developers want more than an orthomosaic—they want compelling visual narratives.
- QuickShots Dronie mode creates a dramatic pull-back reveal of the entire survey area in a single automated maneuver
- QuickShots Orbit captures a 360-degree rotation around a key landmark like a lighthouse or pier head
- Hyperlapse Waypoint mode compresses an entire coastline flyover into a stunning 15-second time-lapse that makes presentations unforgettable
These supplemental clips take under 10 minutes of additional flight time and often become the reason a client renews the contract.
Step 4: Post-Processing Your Coastal Data
Stitching and Ortho Generation
Import your RAW files into your preferred photogrammetry suite. Before processing:
- Apply a uniform D-Log to Rec.709 LUT across all images for consistent color
- Remove any images captured during obstacle avoidance pauses—these are often off-angle
- Verify GPS tag accuracy using the Flip's flight log CSV export
- Set your coordinate reference system to match your client's requirements (most municipal projects use local state plane coordinates)
Quality Control Checkpoints
Run ground control point (GCP) validation against known survey markers. For urban coastal mapping, aim for:
- Horizontal accuracy: ±3 cm with GCPs
- Vertical accuracy: ±5 cm with GCPs
- Point cloud density: 200+ points per square meter at 50-meter flight altitude
Technical Comparison: Flip vs. Common Mapping Alternatives
| Feature | Flip | Mid-Range Competitor A | Enterprise Platform B |
|---|---|---|---|
| Obstacle Avoidance | 6-directional | 4-directional | 6-directional |
| Max Flight Time | 31 minutes | 27 minutes | 42 minutes |
| ActiveTrack | Yes (v5.0) | Yes (v3.0) | No |
| D-Log Support | Yes | Limited | Yes |
| QuickShots / Hyperlapse | Yes | Partial | No |
| Wind Resistance | Level 5 | Level 4 | Level 6 |
| Weight (with battery) | Under 900g | 1,100g | 2,400g |
| Dual-Frequency GPS | Yes | No | Yes |
| RAW Image Capture | 14-bit DNG | 12-bit DNG | 14-bit DNG |
The Flip occupies a unique position: it offers near-enterprise sensor capability and mapping precision in a sub-900g airframe that doesn't require extended commercial licensing in many jurisdictions.
Common Mistakes to Avoid
1. Flying at inconsistent altitudes along sloped coastlines. The Flip supports terrain-following mode. Use it. A 5-meter altitude variation across a survey can create 15–20% resolution inconsistency in your final orthomosaic.
2. Ignoring tidal timing. Mapping the same stretch at high tide and low tide produces two completely different coastlines. Coordinate with tide charts and pick one tidal state for all sessions in a multi-day project.
3. Disabling obstacle avoidance to "save battery." This is a false economy. The Flip's avoidance system consumes negligible power, and a single collision with a pier cable will cost you the drone and the entire project timeline.
4. Skipping oblique passes. Nadir-only mapping misses vertical surfaces entirely. Budget at least one ActiveTrack oblique pass per mission for complete 3D reconstruction.
5. Using auto white balance. Every frame-to-frame color shift creates a potential stitching failure point. Lock white balance to 5500K for daylight coastal work and never touch it mid-mission.
6. Neglecting to clean the lens between flights. Salt spray accumulates fast. A single smudged frame in the middle of your grid creates a visible artifact in the final map. Wipe the lens with a microfiber cloth before every launch.
Frequently Asked Questions
Can the Flip handle mapping missions in moderate coastal wind?
Yes. The Flip is rated for Level 5 wind resistance, which corresponds to sustained winds of approximately 29–38 km/h. For mapping specifically, I recommend flying in winds below 25 km/h to ensure stable hover positioning and sharp image capture. Wind above that threshold won't crash the drone, but it introduces micro-vibrations that soften images and reduce tie-point accuracy in photogrammetric processing.
How many batteries do I need for a typical urban coastal mapping session?
Plan for three to four fully charged batteries per session. A single battery covers roughly 0.15 square kilometers at 50-meter altitude with 80/70 overlap in moderate wind. Add one extra battery for ActiveTrack oblique passes and QuickShots cinematic clips. The Flip's battery swap takes under 20 seconds, so downtime between flights is minimal.
Is D-Log necessary for mapping, or is it only for video?
D-Log is highly beneficial for mapping. The extended dynamic range captured in each RAW frame preserves detail in both deep shadows (under piers, bridges) and bright highlights (water glare, white sand). Photogrammetric software performs measurably better with consistent, well-exposed imagery, and D-Log gives you the widest possible exposure latitude to ensure that consistency. I use D-Log on 100% of my mapping missions, not just cinematic work.
Ready for your own Flip? Contact our team for expert consultation.