Flip for Urban Wildlife Mapping: A Practical File
Flip for Urban Wildlife Mapping: A Practical File-Workflow Guide That Saves Time Later
META: Learn how to use Flip for urban wildlife mapping with a practical focus on capture planning, battery discipline, and the file formats that matter most: SHP, KML, KMZ, OBJ, DXF, and OSGB.
Urban wildlife mapping looks deceptively simple from the air. You launch, collect imagery, run processing, and expect clean habitat boundaries, nest locations, corridor lines, or canopy models to drop neatly into your GIS. In practice, the hard part usually arrives after the flight. Data format choices, positional expectations, and export decisions can quietly determine whether your survey becomes useful working intelligence or just another folder of attractive images.
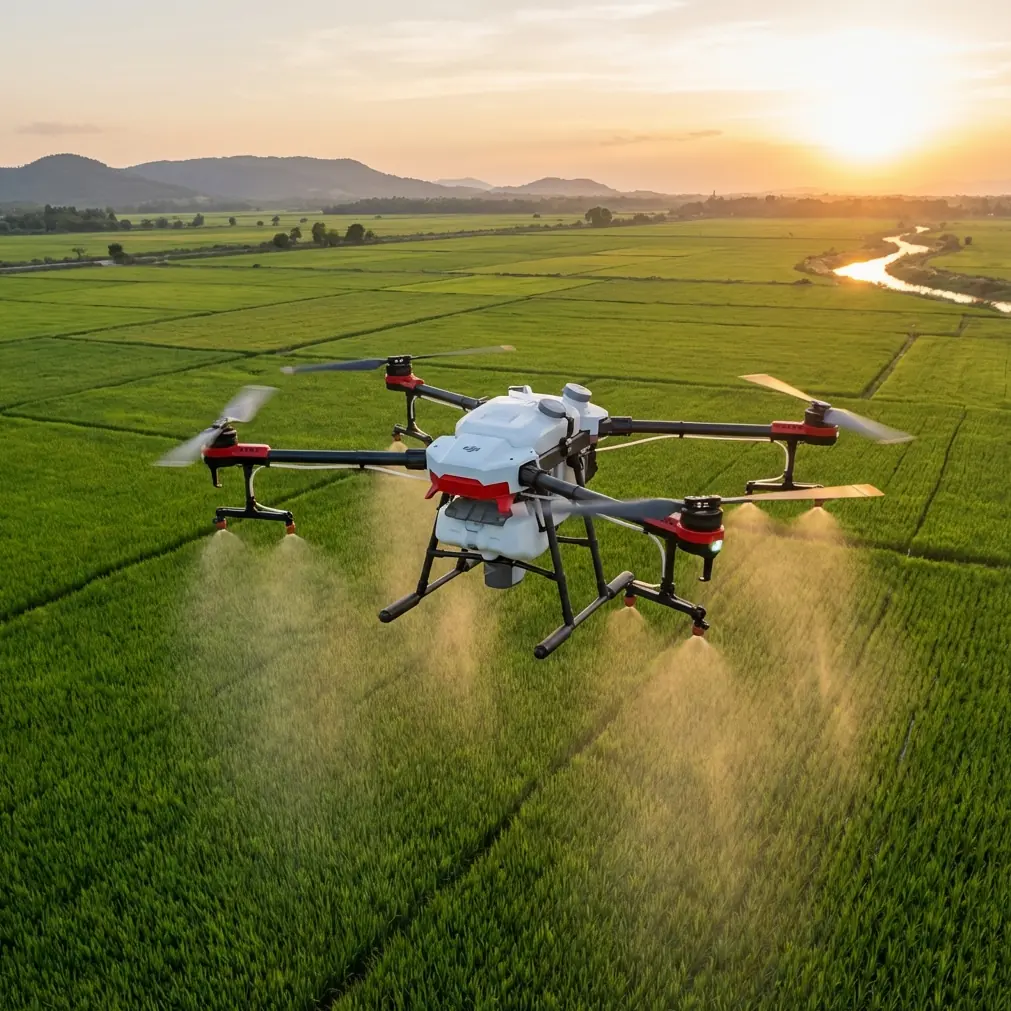
If you’re using Flip for wildlife mapping in urban environments, that matters even more. City parks, drainage corridors, school campuses, roadside green strips, rooftop gardens, and fragmented habitat patches create a mixed landscape where field teams often need to move between aerial observation, visual communication, and GIS-based decision-making fast. The aircraft is only one part of the workflow. The rest is about what your data becomes.
This guide focuses on that missing middle: how to plan a Flip-based urban wildlife mapping job so the outputs are actually usable downstream. I’ll also cover one battery habit from field experience that prevents more mistakes than most people realize.
Start with the real deliverable, not the flight
Before sending Flip into the air, decide what the end user actually needs.
For urban wildlife work, that usually falls into one of three buckets:
- A GIS-ready habitat or observation layer
- A visual map for field teams and stakeholders
- A 3D model for interpretation, review, or editing
Those sound similar, but they lead to different export priorities.
If the ecologist or city planner needs habitat polygons, access routes, roost points, water edges, or vegetation breaks inside a GIS, you’re almost certainly building toward a Shapefile workflow. If the goal is quick spatial review in a familiar consumer-friendly environment, KML or KMZ can be the better bridge. If you need to inspect structures, canopy relationships, embankments, or built-natural interfaces in three dimensions, then OBJ or another 3D format becomes relevant.
This is where many urban mapping projects drift off course. Teams capture well, but they export casually. Then the office discovers that the data can’t be edited easily, can’t be shared smoothly, or doesn’t preserve what the next software stage requires.
Why SHP still matters in a Flip wildlife workflow
The reference material highlights a point that remains highly practical: Shapefile is an industry-standard vector data format used to store non-topological geometry and attribute information in a dataset. That matters for wildlife mapping because many of your core outputs are still vector features.
Think about the things you are likely mapping in an urban ecology scenario:
- tree lines
- wet edges
- habitat patches
- feeding sites
- nest observation points
- exclusion buffers
- survey transects
- drainage-linked movement routes
These aren’t just pictures. They are spatial features with attributes. A habitat polygon may need species notes, confidence level, date, observer, and disturbance ranking attached to it. A roost point may need status fields and revisit dates. Shapefile remains one of the most common formats for this kind of handoff because so many GIS environments still accept it cleanly.
The source also gives an operational detail that’s easy to forget: a standard Shape dataset is not just one file. It typically includes a main file (.shp), an index file (.shx), and a dBASE table (.dbf). In real projects, this is more than file trivia. It affects how teams package and transfer outputs.
I’ve seen wildlife consultants lose half a day because someone emailed only the .shp and forgot the associated files. The geometry opens broken or not at all, and the attribute table disappears. If your Flip mapping job is feeding habitat management or compliance reporting, that kind of mistake can derail review cycles quickly.
Another detail from the source is equally significant: Shapefiles do not contain a topological data structure. In plain terms, they store geometry and attributes, but they are not inherently enforcing topology relationships. For urban wildlife work, that means you should not assume your exported corridor lines and habitat polygons are logically “clean” just because they exist in SHP format. Gaps, overlaps, and slivers can still creep in during digitizing or conversion.
Operationally, this changes how I recommend using Flip outputs:
- Use the drone data to improve observation and digitizing accuracy.
- Export to SHP for compatibility and sharing.
- But run validation in GIS if management decisions depend on boundary integrity.
That extra check becomes especially relevant in fragmented urban sites, where a one-meter edge decision can change whether a patch is treated as connected habitat or isolated vegetation.
KML and KMZ are underrated for urban wildlife communication
The reference material also points out that KML is an XML-based format for describing geographic information such as points, lines, images, polygons, and models, and that it can be recognized and displayed by Google Earth and Google Maps. This is more useful in urban wildlife work than many drone operators give it credit for.
Ecologists, volunteer teams, municipal staff, and property stakeholders often do not work inside a full GIS stack every day. They may need to review nest locations, habitat boundaries, or green corridor proposals visually and quickly. KML gives you a familiar viewing environment, especially when the audience needs to understand location context against roads, buildings, and land use patterns.
That’s where Flip can shine operationally. In a city setting, your survey often has two audiences:
- the technical team doing analysis
- the broader group making decisions or coordinating field actions
SHP serves the first group well. KML often serves the second.
The source also notes that KMZ is a compressed KML package and can include more than just KML text. In practical terms, that makes KMZ a strong choice when you want to bundle a lightweight, shareable field review package. For example, if your urban wildlife team needs to circulate mapped observation points with related visual overlays for a same-day coordination meeting, KMZ can reduce friction.
If I’m advising a Flip operator in this scenario, I usually suggest a dual-export mindset:
- SHP for the GIS editor
- KML or KMZ for everyone else
That small decision can keep a project moving.
3D outputs matter when urban habitat is vertical
Urban wildlife mapping is rarely just about the ground plane. Birds use ledges, bridges, eaves, towers, and mature canopy layers. Bats may relate to façade conditions or treeline adjacency. Green roofs and retaining walls can create microhabitats that don’t read properly in flat mapping alone.
The reference source mentions several 3D-related formats, but one detail stands out: OBJ is a standard 3D model format originally developed for model interchange and is well suited for moving models between 3D software packages. It also notes that a model generated in Smart3D can be exported as OBJ and then brought into software such as 3ds Max or others for editing.
That interoperability matters if your Flip mission includes photogrammetric model generation for interpretation rather than just orthomosaic production. In urban ecology, 3D models can help teams inspect:
- tree-to-building relationships
- nesting ledges
- façade recesses
- canopy height transitions
- embankment complexity
- rooftop habitat structures
If your processing pipeline generates a textured model but your environmental team or visualization specialist wants to refine, annotate, or present it elsewhere, OBJ is often the easiest common language.
The source also references OSGB as a format used for oblique 3D model data with embedded texture links. That can be useful when your workflow emphasizes textured city-scale scene review. But from a practical handoff perspective, OBJ is often the more universal edit-friendly choice when different software teams need to touch the model.
For Flip users, the lesson is simple: if your mission may evolve into 3D review, plan for that before capture. Don’t fly only for pretty nadir coverage if the habitat question is inherently vertical.
A note on positional expectations: standards still matter
The source cites mapping accuracy guidance from GB/T 7930-2008 for topographic photogrammetry and also references engineering measurement norms. You do not need to be operating under a formal surveying contract to take the spirit of that seriously.
The practical point is this: positional error tolerances are not abstract. In wildlife mapping, they affect decisions.
If you’re delineating a pond margin used by amphibians, locating a nest tree near a planned maintenance route, or defining a corridor through an urban redevelopment block, small placement errors can become operationally significant. Flip can support high-quality collection, but your final confidence depends on more than the aircraft. It depends on flight height, overlap, scene texture, GNSS quality, control strategy where applicable, and disciplined processing.
The smart approach is to describe outputs honestly. Use the right level of confidence for the task. A habitat screening layer is not the same as a survey-grade legal boundary, and your file format won’t fix that distinction.
The battery habit that protects data quality
Now for the field tip.
On urban wildlife jobs, I never treat a battery as just a fuel tank. I treat it as a decision boundary.
The mistake I see most often is pushing one battery too far because the site looks small. In a city, small sites can be deceptive. Wind corridors between buildings, repeated repositioning, obstacle avoidance events, and re-framing around trees or structures all add inefficiency. If you’re using intelligent features such as subject tracking or ActiveTrack-style behavior for observation support, power use can become less predictable than during a straightforward mapping grid.
My rule in the field is simple: land early if the battery remaining is no longer comfortably larger than your uncertainty.
Uncertainty includes:
- unexpected wind on return
- temporary GNSS degradation near buildings
- one more orbit to confirm canopy use
- a second pass because shadows cut image quality
- a safe relocation due to pedestrians or traffic constraints
Here’s the habit that has saved more datasets for me than any accessory: after each battery, I write one short note before relaunching. Just one line. Something like: “Battery 2 ended early due to roof turbulence on north side; refly edge strip at higher margin.” That note keeps the next launch honest. It prevents rushed continuation based on vague memory, which is where coverage holes happen.
For wildlife mapping, incomplete coverage is not just annoying. It can erase habitat evidence you may not be able to recreate under the same light, access, or species activity conditions.
A practical Flip workflow for mapping wildlife in urban areas
Here’s the workflow I’d use.
1. Define the biological question
Are you locating features, delineating habitat, or assessing vertical relationships? This decides whether your final package leans toward SHP, KML/KMZ, or 3D outputs like OBJ.
2. Capture for interpretation, not just aesthetics
In urban areas, obstacle avoidance and careful route planning matter because trees, poles, facades, and wires complicate clean collection. If the mission involves behavioral observation, subject tracking can help support documentation, but don’t let automated convenience compromise structured coverage needed for mapping.
3. Keep cinematic modes in their lane
QuickShots, Hyperlapse, and D-Log can all have a place in communication and reporting. D-Log is particularly useful if you need more flexible grading for visual presentations under mixed urban lighting. But those modes do not replace disciplined mapping imagery. Use them as supplements, not substitutes.
4. Build two export paths
Create a technical GIS package and a communication package.
- GIS package: SHP for vector habitat features and observations
- Communication package: KML or KMZ for quick viewing in Google Earth or compatible tools
5. Use 3D only when it answers a habitat question
If a vertical urban feature matters, export a model in OBJ so it can be reviewed or edited across different 3D software environments.
6. Package files properly
If you send a shapefile, send the associated components together. The .shp, .shx, and .dbf belong as a set. That one discipline avoids a surprising amount of project friction.
7. Document confidence
If site conditions limited precision, say so. The most useful drone operator is not the one who overstates certainty, but the one who gives the ecology team a reliable basis for action.
Why this matters for Flip specifically
Flip fits urban wildlife work best when it is treated as part of a full information chain rather than as a standalone flying camera. The aircraft helps you gather perspective quickly in constrained city spaces. But the value compounds only when the output matches how environmental data is actually consumed.
A polygon that lands in SHP and carries clean attributes can support habitat management.
A KML overlay can bring nontechnical stakeholders into the conversation immediately.
An OBJ model can reveal vertical habitat relationships hidden in 2D mapping.
That combination is where a small aerial platform becomes a serious field tool.
If you want help choosing the right export path for your urban wildlife mapping workflow, you can message the team here and describe the site, software stack, and deliverables you’re working toward.
The biggest takeaway is not about one format beating another. It’s about matching the file to the decision. The reference material makes that clear once you read it operationally: vector standards, XML-based sharing layers, and interoperable 3D formats each solve different problems. Flip becomes more useful the moment you plan around those differences before takeoff rather than after processing.
Ready for your own Flip? Contact our team for expert consultation.